

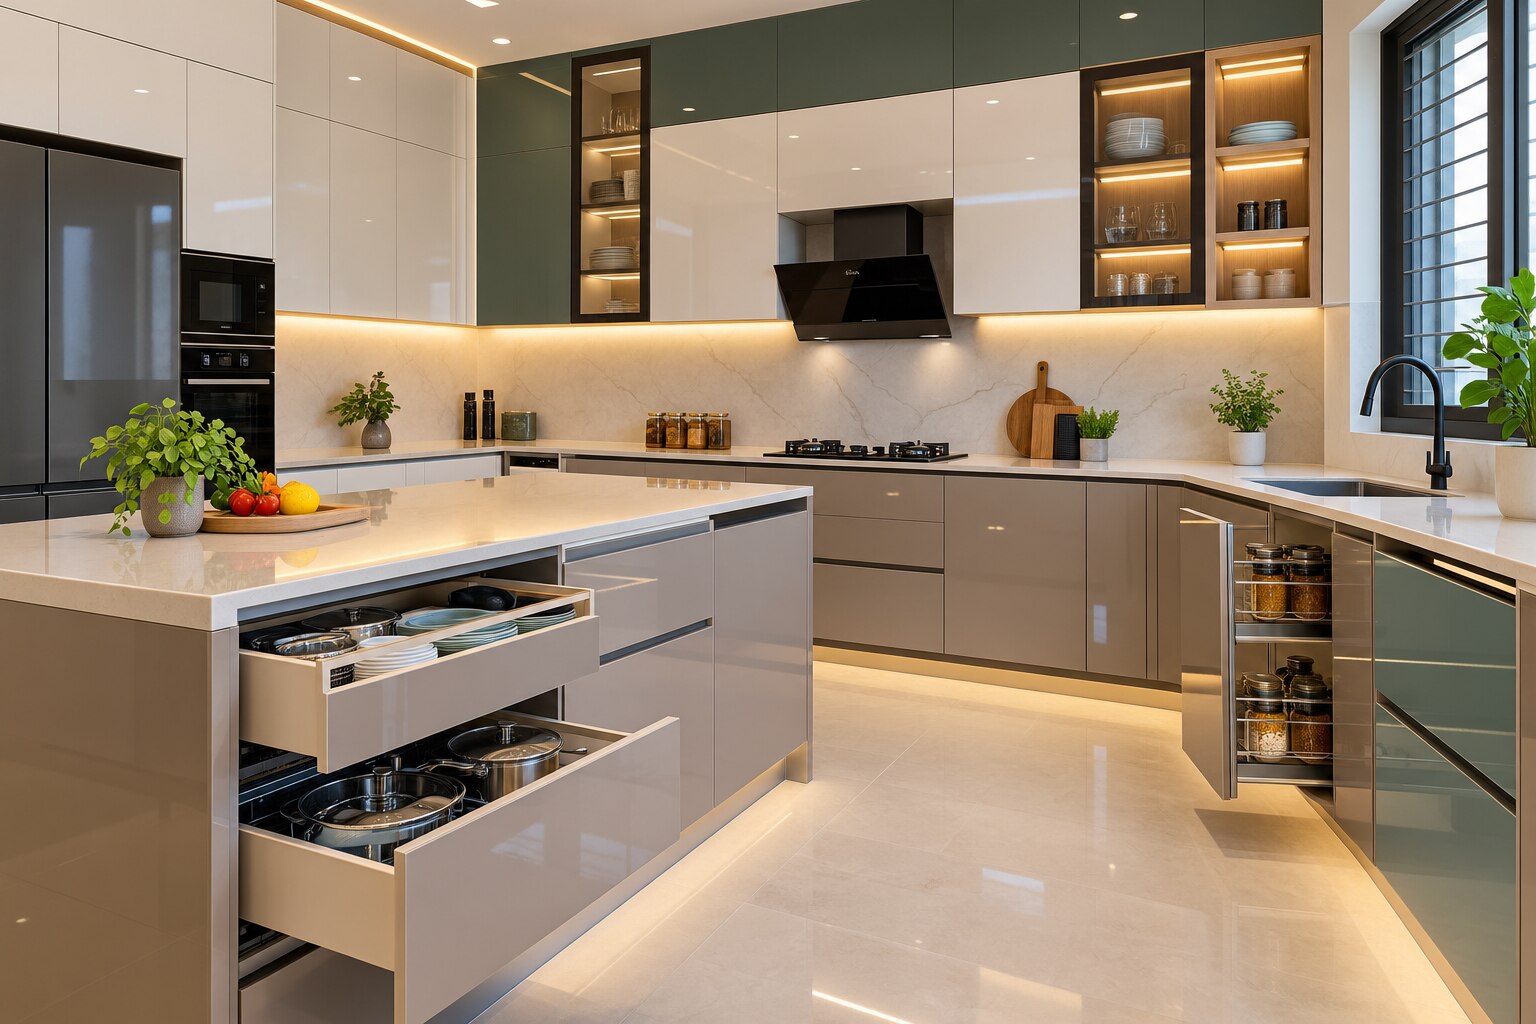
A cabinet colour that looks balanced in a showroom can appear harsh under warm LEDs, overwhelm a low ceiling, or reveal every fingerprint beside the hob. By the end, you will be able to assess colour, finish, construction quality and storage against your kitchen’s light, cooking habits, equipment and cleaning time.
Key takeaways
- Test samples under daylight and your installed 2700–4000 K lighting.
- Match gloss or matt acrylic to cleaning habits and visible wear.
- Inspect edge sealing, alignment, thickness and hardware before approving fronts.
- Divide storage into work, cooking, pantry, serving and waste zones.
How should you choose acrylic colours for the kitchen’s light and proportions?
Choose acrylic kitchen colours only after seeing a physical sample in the actual kitchen under daylight and the planned artificial lighting. Warm 2700–3000 K lamps can make white and beige look yellow, while neutral 3500–4000 K light reveals cooler blue or grey undertones; poor colour rendering can distort both.
Compare the sample beside the fixed floor, backsplash and worktop, not against a showroom wall.
| Colour choice | Works best when | Main caution |
|---|---|---|
| White acrylic cabinets | The room is small, shaded or has a low ceiling; pale surfaces make it feel larger and taller | Pure white exposes yellowing, uneven gaps and shadow lines |
| Neutral acrylic finishes | You want a flexible base with stone, metal or coloured accessories | Beige, greige and grey change noticeably under warm or cool lamps |
| Wood-tone acrylic kitchen cabinets | You need warmth in a white, grey or north-facing kitchen | Match the undertone to the floor and worktop; competing grains create visual noise |
| Dark grey or black | The kitchen is large, bright and has generous ceiling height | Dark gloss shows dust, fingerprints and fine scratches, while dark walls can feel enclosing |
| Two-colour combinations | You want contrast without covering every surface in a strong colour | Put the lighter colour on upper cabinets and the more forgiving tone on busy drawer banks |
In a compact kitchen, keep upper fronts light, continue a pale backsplash upward, and avoid a dark band beneath a low ceiling. Use wood tones or dark shades on a tall unit, island or lower cabinets instead of all four walls. Mid-tone colours hide minor installation marks better than expansive pure white or black.
Which acrylic finish fits your cleaning routine and daily wear?
A high-gloss acrylic kitchen creates the strongest reflections and a crisp, spacious look, but it also exposes fingerprints, grease smears, swirl marks and uneven reflections. Choose it for lightly handled doors; use handle profiles or recessed pulls to reduce contact. It is unsuitable for strong sunlight, children, heavy cooking or limited cleaning time.
| Finish or material | Reflection and visual impact | Marks, scratches and cleaning effort |
|---|---|---|
| Gloss acrylic | Bright reflection; polished appearance | Shows fingerprints and grease; wipe with a soft damp cloth |
| High-gloss acrylic | Maximum reflection; enlarges small rooms visually | Shows every smear, dust mark and fine scratch; needs frequent wiping |
| Matte acrylic cabinets | Low reflection; calm, contemporary appearance | Hides smears, but scouring pads and dry dusting create shiny patches |
| Anti-fingerprint acrylic | Soft matte look with reduced touch marks | Easier daily care; not scratch-proof; avoid abrasive cleaners |
| Textured acrylic | Breaks reflections; adds surface depth | Conceals grease and scratches better, but grooves hold dust and take longer to clean |
| Glass-like acrylic | Even, reflective finish resembling glass | Visually sharp; fingerprints and impact damage remain visible |
| Laminate | Flat to lightly textured; broad design range | Usually more forgiving and economical; edges and seams need protection |
| Membrane | Smooth, seamless appearance | Heat and steam near a hob can lift or distort the film |
| PU paint | Deep colour and seamless sheen | Easy to colour-match, but chips and repainting are disruptive |
| Veneer | Natural grain and warmth | Needs controlled moisture; marks and colour variation show character |
| Glass | Strong reflection and depth | Easy to wipe, but heavier and vulnerable to impact |
For acrylic versus laminate and PU paint, choose acrylic for richer reflection, not because the substrate is automatically stronger. A textured or anti-fingerprint finish suits heavy cooking better than high gloss.
How can you check that an acrylic front is genuinely well made?
Inspect a door or drawer sample, not only a showroom panel. Record the manufacturer’s coded finish, batch or lot number, sheen specification and edge-band colour; visually similar acrylics can differ in undertone, reflection and thickness, making later replacements obvious.
Use this acrylic cabinet quality check:
- Measure the acrylic sheet thickness with a caliper at an exposed edge, then lay the sample on glass. Gaps, bowing or rocking indicate poor flatness.
- View it in daylight and under the planned kitchen lighting. Colour should remain even across the panel, without clouds, pinholes or shade changes.
- Ask for a written statement that it is UV-stable acrylic and request an exposed sample or test evidence. Sunlight can yellow or alter a non-stable surface.
- Run the supplier’s recommended scratch test on a spare sample, never the approved door. Matte finishes are not scratch-proof.
- Examine acrylic edge finishing under a strong side light. The edge-band should match the recorded colour, sit flush and show no chipping, open joint or glue bead.
- Look at the rear and corners for bubbles, lifting, gaps or adhesive squeeze-out. These reveal weak bonding before the front visibly fails.
- Check joints from normal standing distance and at an angle; a visible seam, misaligned grain or uneven reflection signals inaccurate fabrication.
The acrylic layer is only the face. Confirm a stable MDF, HDF, plywood or particleboard substrate, fully sealed edges and a sink cabinet with sealed cut-outs, protected edge-bands, waterproof liner and accessible shut-offs. Clean with a soft damp cloth and diluted mild detergent; avoid abrasives, melamine sponges, scouring pads and dry dusting.
How many storage zones should an acrylic kitchen have?
Do not choose a fixed cabinet count: calculate acrylic modular kitchen storage from what you own and how you cook. List cookware, plate stacks, serving dishes, groceries, bottles, appliances and cleaning supplies; record each item’s footprint, height, weight and frequency of use.
Add space for duplicates and future purchases, then group them into kitchen storage zones by task.
| Zone | Assign it to | Planning rule |
|---|---|---|
| Drawer banks | Cutlery, plates, pans and daily utensils | Use low drawers for heavy loads; check the complete drawer, runner and fixing rating. |
| Shelves | Backup crockery and occasional cookware | Fixed shelves cost less but hide items behind the front row. |
| Tall units | Brooms, appliances and bulk groceries | Reserve full-height access without putting heavy goods overhead. |
| Corner storage | Infrequent cookware | A carousel or magic-corner improves reach but adds cost, clearance and maintenance. |
| Lift-up shutters | Light appliances and display items | Keep contents light; the mechanism needs its own load rating. |
| Pantry pull-out | Packets, tins and dry goods | Choose shelf width and runner capacity for loaded groceries. |
| Bottle pull-out | Oils, sauces and tall bottles | Place near preparation space, away from children’s reach. |
| Waste sorting | Wet, dry and recyclable waste | Keep bins beside the sink, with removable, washable protection. |
| Appliance garages | Mixer, toaster and coffee equipment | Provide sockets, ventilation and door clearance. |
Bring heavy pans, crockery and appliances forward in base drawers or units, never overhead cabinets. Protect the sink cabinet with sealed edges, a waterproof base and serviceable plumbing access.
Open shelves and glass fronts demand coordinated containers, dusting and tighter colour control; keep them away from the hob and sink. Corner hardware never recovers every centimetre, so a simple drawer run can offer better value when access matters most.
What should you put in the final acrylic kitchen specification?
Sign off the acrylic kitchen specification only after every visible choice has a measurable construction detail behind it. Approve the actual colour and finish sample in daylight, then under the planned 2700–3000 K, 3500–4000 K or neutral lighting; colour-rendering quality can change what you see.
- Record the acrylic finish code, sheen level, sheet thickness, batch or lot number and edge-band colour.
- Name the kitchen cabinet substrate: MDF, HDF, plywood or particleboard. Request formaldehyde emission documentation, such as compliance with the applicable Indian board standard or US EPA TSCA Title VI.
- State drawer and lift-up hardware load ratings, shelf thicknesses, hinge quantities and the intended location of heavy cookware.
- Detail sealed sink cut-outs, protected edge-bands, a removable waterproof liner and accessible plumbing shut-offs. A leak will defeat ordinary “water-resistant” board.
- Add kitchen hood duct planning: duct diameter, route length, bends, make-up air and appliance clearances, confirmed against the hood manufacturer’s instructions.
- Show storage dimensions for drawer banks, pantry pull-outs, waste sorting, appliance garages and open or glass-front sections.
Compare quotations line by line rather than comparing the showroom image.
| Specification item | Quote A | Quote B |
|---|---|---|
| Substrate and emissions | Named board and document | Named board and document |
| Hardware | Brand, model and load rating | Brand, model and load rating |
| Sink protection | Sealed cut-outs and liner | Sealed cut-outs and liner |
| Hood route | Diameter, bends and length | Diameter, bends and length |
A studio such as Design Doves can coordinate these decisions with measured manufacture, joinery and installation drawings. Treat its showroom finish as a sample of appearance, not proof of substrate quality, sealing or extraction performance.
Frequently asked questions
How should you choose acrylic colours for the kitchen’s light and proportions?
View physical samples in the actual kitchen under daylight and planned artificial lighting. Warm 2700–3000 K lamps add yellow, while neutral 3500–4000 K light exposes blue or grey undertones. Use lighter colours to support smaller or darker rooms, and confirm the effect against the kitchen’s proportions.
Which acrylic finish fits your cleaning routine and daily wear?
Choose gloss when you want stronger light reflection and accept visible fingerprints and reflections. Choose matt when you prefer a softer appearance and less glare. Compare cleaning effort, scratch visibility, handle use and the finish’s position near sinks, hobs and busy walkways.
How can you check that an acrylic front is genuinely well made?
Inspect a physical door for an even surface, consistent colour, clean edge sealing, square corners, accurate drilling and smooth hardware movement. Check that adjoining fronts align and ask for the acrylic specification, substrate, edge treatment and warranty in writing.
How many storage zones should an acrylic kitchen have?
Plan storage by activity rather than cabinet count: preparation, cooking, pantry, crockery and serving, cleaning, waste, appliances and occasional-use items. Place each zone near its point of use, then size drawers, shelves and tall units around your inventory.
What should you put in the final acrylic kitchen specification?
Record colour codes and finish, sample approval, panel substrate and thickness, edge treatment, hardware models, cabinet dimensions, internal fittings, lighting colour temperature, appliances, installation scope, exclusions, cleaning instructions and warranty terms.