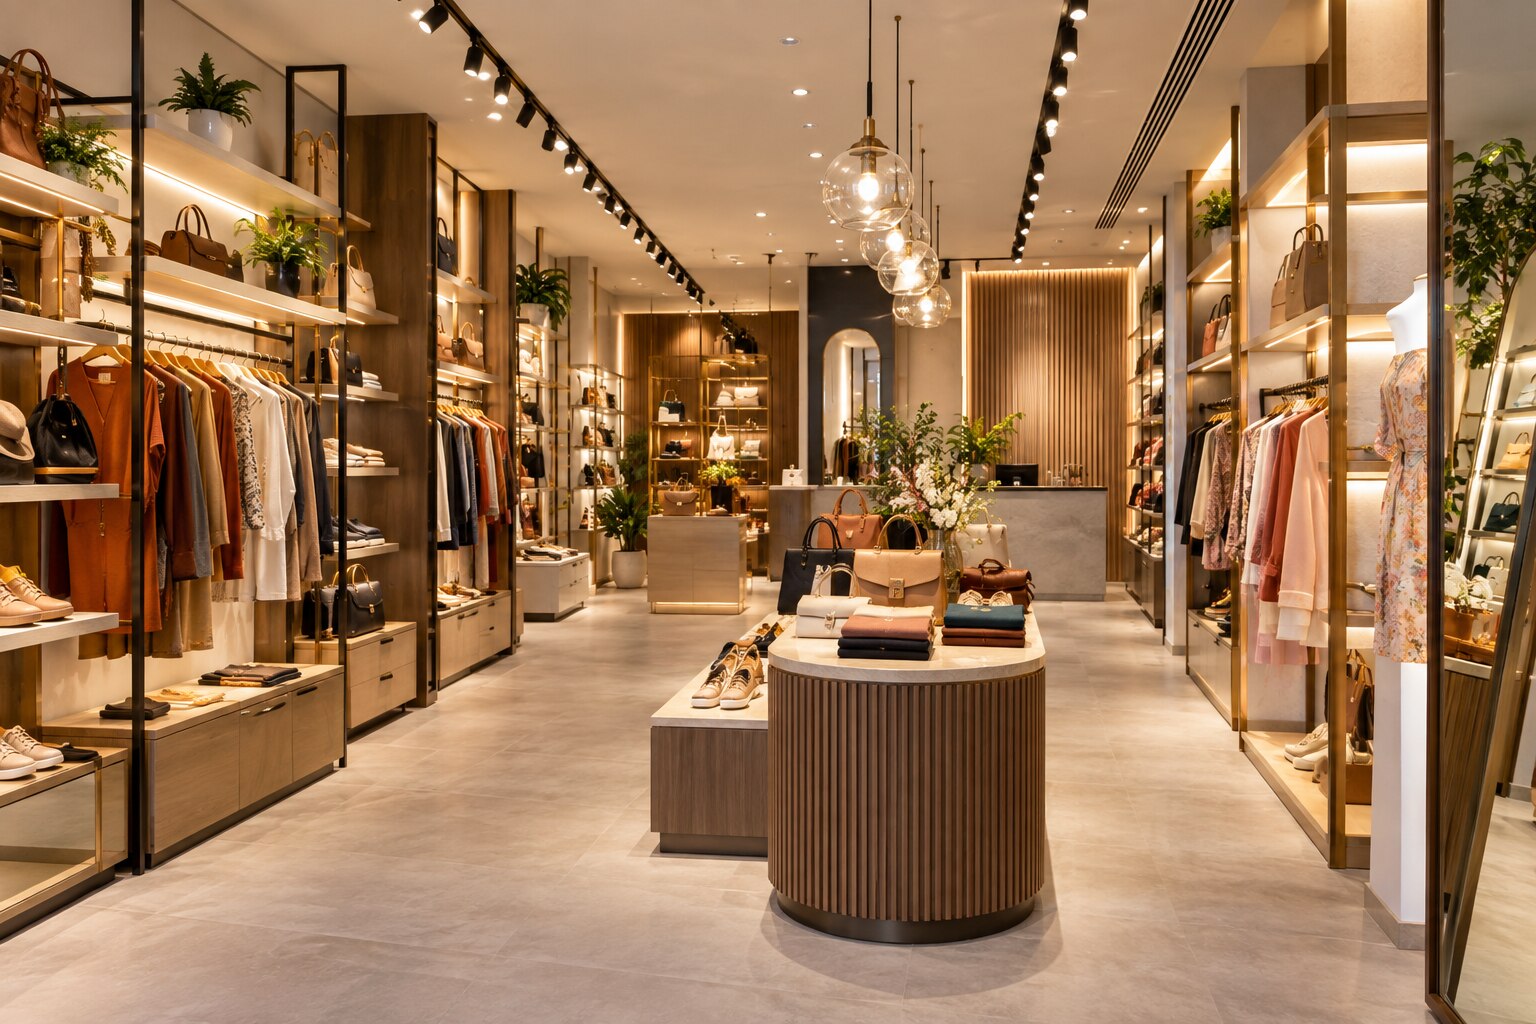
A shop can have beautiful fixtures and still lose sales when customers cannot read the route, staff cannot replenish stock, or lighting changes the colour of merchandise. A useful plan connects customer movement, display capacity, storage access, lighting performance, accessibility, security, and daily operations before fabrication begins.
Key takeaways
- Map customer, staff, and delivery routes before sizing fixtures.
- Separate selling stock from back stock when calculating display capacity.
- Use layered lighting, glare control, and clear sightlines to guide attention.
- Keep checkout, replenishment, and waste routes independent where space allows.
Map Three Movement Systems Before Drawing the Fixtures
Start with three separate lines before sizing a fixture: customer journey mapping, staff replenishment, and deliveries or waste removal. Keep customer movement on the primary circulation route from entrance through browsing zones, featured products, fitting rooms or consultation areas, checkout, and exit.
Treat the first few feet inside the door as a decompression zone, not dense merchandising space.
- Draw the primary circulation route and keep its accessible clear width open throughout. Use 1,200 mm as a planning target, then confirm the required width under local accessibility and building rules. Test it with a wheelchair, pram, browsing customers, queues, open drawers, cabinet doors, and projecting signs.
- Add secondary circulation between display bays, fitting rooms, consultation points, and checkout. A grid suits efficient browsing and high product density; a loop exposes more stock but consumes floor area; free-flow planning suits exploratory retail but demands stronger sightlines.
- Draw service circulation paths behind or beside the sales floor for cartons, replenishment trolleys, ladders, waste, and staff access. If a separate route is impossible, schedule deliveries and restocking outside trading peaks rather than blocking the customer path.
- Mark columns, door swings, fire equipment, electrical panels, exits, and fire-fighting installations as untouchable zones. Walk the route at full scale before approving joinery; a technically open aisle can fail once customers queue or merchandise projects into it.
Calculate Display Capacity and Separate Selling Stock from Back Stock
Decide by matching each product’s sales role to the stock needed for one trading period. Measure packaged dimensions, hanger type, folding depth, replenishment quantity, shelf load, and the intended user’s reach before selecting fixtures.
| Display storage | Put here | Design test |
|---|---|---|
| Open shelves or rails | Best sellers, new arrivals, and products that need comparison | Can customers see, reach, and return items without blocking the route? |
| Customer-facing drawers or cabinets | Variants, sizes, colours, and smaller items | Can a shopper open them safely, with usable shelf spacing and no projection into the aisle? |
| Staff-only stock areas | Cartons, reserve sizes, packaging, tools, and slow-moving inventory | Can staff retrieve it without crossing the customer path or storing boxes in corridors? |
Calculate capacity from the merchandise backward. For folded goods, divide usable shelf height by the folded item height, then reduce the result for hand clearance and visual presentation.
For garments, calculate rail length from hanger width and add hanging space for size separation; counter length must also accommodate the product, payment equipment, and a clear handover area.
- Keep only enough open stock to make the range legible and easy to browse.
- Place additional sizes or colours in customer-facing storage when shoppers benefit from self-service.
- Hold replenishment cartons in a staff-only zone, sized for the delivery cycle rather than an attractive but unusable cupboard.
Test every fixture with doors, drawers, signs, garments, and queues extended. An aisle that passes on an empty plan can fail during browsing or restocking. Schedule replenishment outside busy periods if a separate service route is impossible.
Use Layered Lighting and Clear Sightlines to Guide Attention Safely
Use ambient lighting to establish orientation, then add vertical light so products, faces, and signs remain readable. Use accent lighting to draw attention to priority displays, not to make the entire shop brighter; excessive general brightness creates glare, discomfort, and a visually flat floor.
Keep the first few feet inside the entrance relatively uncluttered. Customers need to adjust before browsing, and a clear view towards featured products, fitting rooms, and checkout helps them understand the route. Place mirrors where they extend sightlines without facing a bright fitting directly into the customer’s eyes.
Signage needs contrast, even illumination, and a viewing angle that avoids reflections from glass, polished stone, or lacquered joinery. Keep display heights and hanging signs from blocking staff views across aisles. Security cameras need an unobstructed view of entrances, high-value displays, and checkout; do not hide them behind decorative pendants or tall shelving.
- maintained illuminance on product fronts, shelves, counters, and floors
- glare control, beam spread, aiming, and dimming range
- colour rendering and colour temperature suited to the merchandise
- separate control zones for displays, fitting rooms, checkout, façade, and back-of-house
Use task lighting at checkout and consultation points, with softer vertical light in fitting rooms so faces and garments appear natural. Test fabrics, leather, jewellery, and cosmetics under the proposed lamps and finishes in a full-scale sample bay. The mock-up exposes reflected glare and blocked sightlines before installation.
Design the Checkout and Back-of-House Route as Working Infrastructure
Checkout placement should keep the payment point visible from the sales floor without forcing customers, staff, or wheelchair users into the same narrow approach. Allow queue formation outside the accessible route, and provide bagging space beside the counter rather than in the walking lane.
Use these early planning dimensions as a test, not as Delhi NCR law:
- 915 mm minimum clear width for an accessible route, using the U.S. ADA benchmark.
- 1,525 mm diameter for a 180-degree wheelchair turning space.
- Extra depth at the counter for payment, returns, packaging, and a customer who cannot approach from the standard side.
- A separate staff position for receipt rolls, cash handling, click-and-collect orders, and held merchandise.
Measure routes with drawers open, cabinet doors swung out, hanging garments extended, and a real queue in place. An empty plan can show a compliant aisle that becomes unusable at peak hours.
Behind the sales floor, connect receiving, stock storage, checkout replenishment, staff facilities, and waste removal without sending cartons or trolleys through browsing areas. Schedule replenishment before opening or after closing when a dedicated back-of-house route is impossible; repeated daytime crossings interrupt sales and create trip hazards.
Keep exit access, fire extinguishers, fire-fighting installations, electrical panels, and fire doors permanently clear. Do not use those zones for spare stock or promotional stands. Emergency lighting must cover the escape route and remain effective during a power failure, with the final positions checked against the applicable fire and building regulations.
Test the Plan, Compare the Documents, and Choose the Right Fixture Strategy
Approve bespoke joinery only after a full-scale mock-up proves that people, products, doors, drawers, and light work together. Build one representative display bay, counter, and customer route at 1:1 scale; test sightline height, fitting-room privacy, glare, drawer-opening conflicts, and the distance between products.
Use a pre-installation check:
- Walk the route with a customer, staff member, loaded stock trolley, and wheelchair. Measure clear width with doors, drawers, garments, signs, and queues projecting into the aisle.
- Compare the dimensioned floor plan with the reflected ceiling plan. Match every fixture, spotlight, track, power point, sign, and door swing; a ceiling light centred on an empty plan can miss the merchandise after joinery changes.
- Recheck the bill of quantities against the approved fixture schedule. Confirm bay widths, shelf depths, hanging rails, drawer counts, materials, and back-stock capacity before fabrication.
- Place fabric, leather, jewellery, cosmetics, or food samples under the proposed lamps and finishes. Judge colour separation and glare in the mock-up, not from a catalogue rating.
Choose the fixture strategy against the shop’s behaviour, not fashion.
| Option | What it means | When it applies |
|---|---|---|
| Grid | Straight runs and high density | Efficient browsing and compact footprints |
| Racetrack | A loop exposing more assortment | Larger shops with discovery-led routes |
| Free-flow | Irregular fixtures and open sightlines | Luxury browsing with active staff wayfinding |
For a manufacturer such as Design Doves, freezing this tested set of dimensions before production prevents elegant joinery from creating unusable routes.
Frequently asked questions
Which movement systems should you map before designing shop fixtures?
Map the customer journey, staff replenishment route, and delivery or waste-removal route before drawing fixtures.
How do you calculate display capacity in a shop?
Measure usable shelf, rail, and hanging capacity, then separate customer-facing selling stock from back stock.
How can lighting guide customers without creating safety problems?
Combine ambient, accent, and task lighting while controlling glare and preserving clear sightlines along circulation routes.
What should the checkout and back-of-house route include?
Plan checkout as working infrastructure with room for transactions, storage, replenishment, deliveries, and waste removal.